How do I assign a Contact to my volunteer listing?

Want control over who receives notifications for a particular volunteer opportunity? Assign a Contact to your listing to be sure the right person gets notified!
When you assign one or more contacts to a volunteer listing, only those contacts receive instant email notifications when a volunteer expresses interest.
Adding a Contact
Organization administrators are contacts by default, but Contacts don’t need to be administrators.
To add a new contact to your organization account:
1. Log in at idealist.org using an email address that already has administrator access.
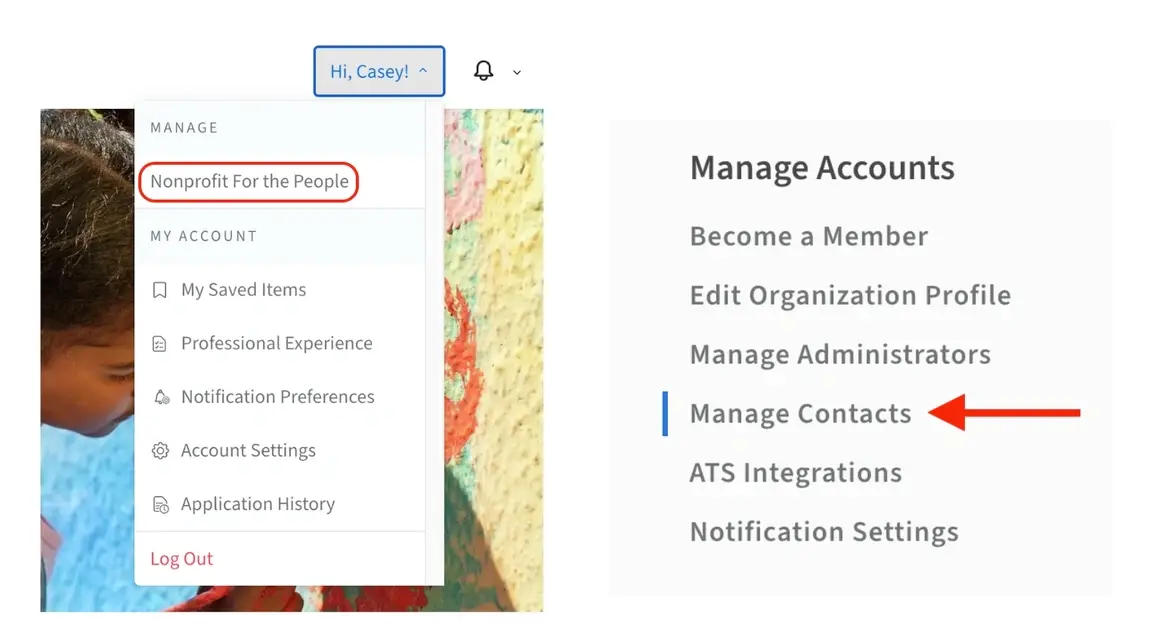
2. Navigate to your organization’s Dashboard by clicking your name at the top right corner and selecting your organization from the dropdown menu.
3. Select “Manage Contacts” from the menu on the left.
4. Click the blue “Add New Contact” button. You will then be able to enter the email address for your new contact. We’ll send an automated email to verify—once they accept the invitation, they’ll be all set to receive notifications.

Assigning a Contact to a Listing
Once the Contact(s) have been added to the organization’s profile, you’ll have the ability to assign them to any listings they’re recruiting for!
Please note that the contacts will not display publicly on the listing.
New Listings
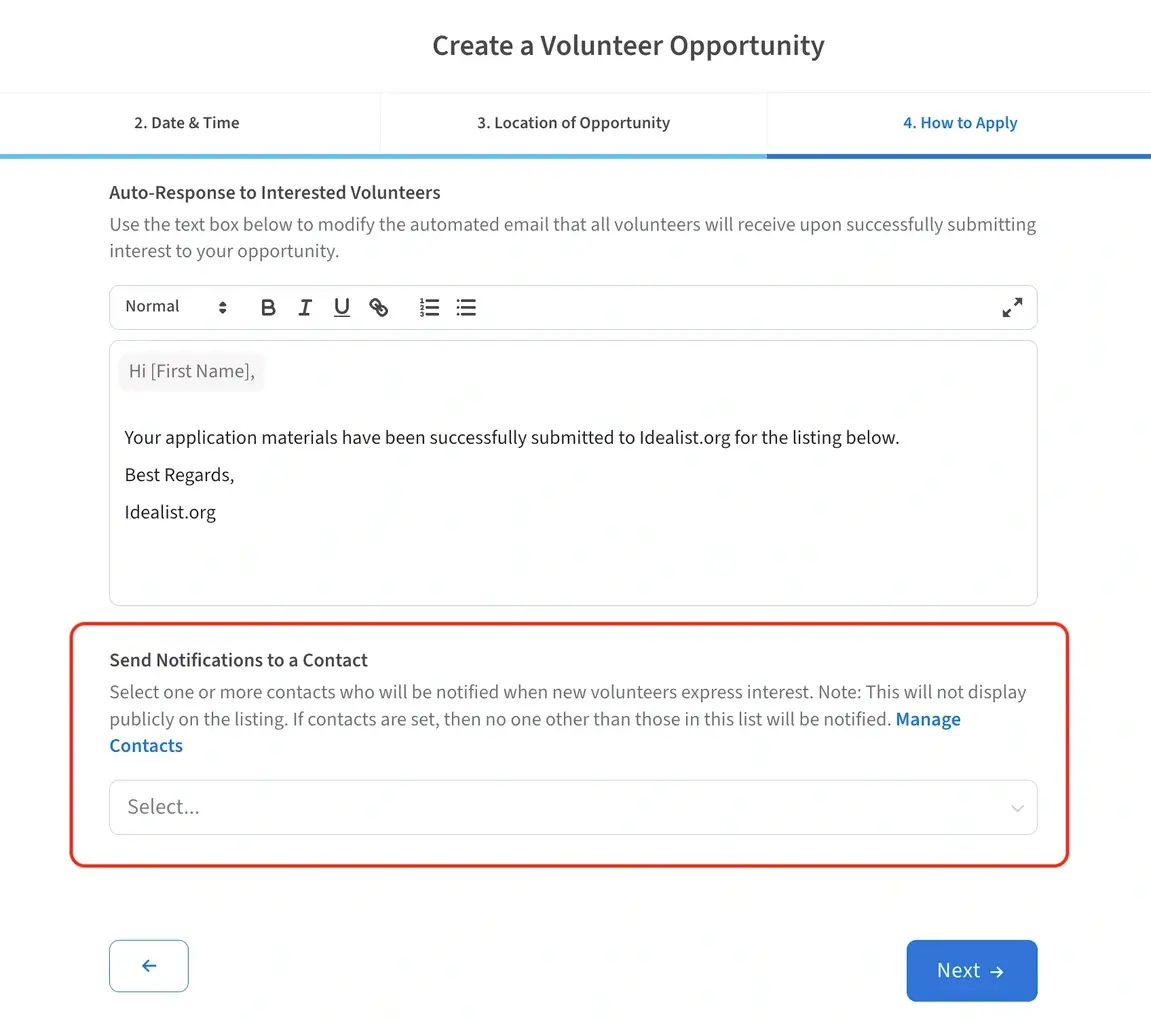
When creating a new listing, you’ll have the ability to assign contacts on page 4 of the “Create a Volunteer Opportunity” form.
Scroll to the bottom of the How to Apply section and you'll see the option to "Send Notifications to a Contact." Click "Select" and a list of available contacts will populate. Select their name to assign them and you'll be all set!
Published Listings
To assign the contact on a published listing, head to your “Manage Listings” section then click “Edit” next to the listing you'd like to assign them to. Scroll to the bottom of the How to Apply section and you'll see the option to "Send Notifications to a Contact." Click "Select" and a list of available contacts will populate. Select their name to assign them, then click “Save”.
Additional Resources
Check out our other articles for more information on:
Contact Us
Have questions? Contact Us—we’re always happy to help!
